Don’t let your dialogue be drowned out by sound.
When tasked with applying music and sound to a video, film, or even game, there are many things to ask yourself. The most important question being: What is the desired effect? Which emotions do you want from this scene? Does the scene need a full soundtrack, or even music at all? Is the music you’ve selected too distracting? Does it help with immersing the viewer?
Here we need to understand that we can use music in two ways: As soundtrack and as underscore. What’s the difference?
Soundtrack is when there is recognizable music playing loudly. It can pull the strings of our emotions, pumping us up in excitement as the Wagnerian trumpet chorus of a John Williams track blares out in Star Wars, or it can raise a feeling of unsettling terror like when Hans Zimmer uses Loire Cotler’s strange and rhythmic voice to transport the viewer into the dream sequences in Dune.
Underscore, on the other hand, is much more subtle and quiet. More than leading the intended mood, it assists the mood that is created by the actors and their dialogue. It is hardly noticeable, just background elements, often utilizing pads and sustains. Where with the soundtrack, the goal is for the viewer to HEAR it, with underscore the goal is to FEEL it. It helps bring the viewer into the moment and immerse them completely in what is happening.
“The most important thing about underscore is that it just subtly supports the emotions and what is seen,” says Matthias Wolf, a composer who also does tracks for Smartsound. “Not too obvious and remain rather unobtrusive. The monologue should remain in the foreground, and you have to support the moodswings musically.”
Does a video need a soundtrack or underscore?
The soundtrack and underscore is of course, the director’s call. It comes down to the intended effect. For shorter videos, it’s possible no soundtrack or underscore is really necessary. If the video is coming across as too silent though, it might be best to have something that is effective there. Underscore is also advisable when the actors or speaker isn’t having as good a delivery as expected, or perhaps the material is too dry and needs some enrichment.
“In the end, less is more,” Matthias advises. “Too busy or dense [a soundtrack] distracts from the essentials. Except in larger sequences like battles or car chases, or when the music is really just allowed to stand on its own. In underscore, the music should only be an accessory. It should not take itself too important. And that’s the art of finding the right balance there. Because without it, it wouldn’t work either.”


Check out Matthias Wolf’s albums on Smartsound Cloud.
Spotting the film
Generally, the composer enters the scene during a “spotting session”. They meet with the director and take notes on their ideas regarding the tempo, sound balance, volume, placement and so on. Some directors will include the composers from the very beginning, even before they shoot the film. The score and sound of a film is such an incredibly important aspect of the film or work, and how that piece is expressed, that it’s essential for the director to be involved. Lacking that involvement can result in a project entirely different than what the director was expecting – for good or bad.
At the same time, or just before or after, the composer will watch the movie with just the normal sounds and foley. They expand on their spotting sheet, and from there begin to do the real work of composing. “I watch the scene closely and anticipate the tempo and general tone of the sequence,” says Matthias. “It’s important to recognize the dramaturgy and intensity of the scene. You also have to understand the subtext of the scene and the overall context of the film.”
When the composer is finally ready, they take an orchestra, or musicians – or if it’s electronic then they can simply play it back – and watch the film as the group is playing, taking further notes. Of course, in today’s world, it’s simplified. Most composers now can record their tracks using high quality instruments, like those available from Sonuscore, for all their spotting needs.
When the composer is done writing the work, they send it off to a studio to be properly performed and recorded. Sound engineers get their hands on it, adjust it so the dialogue can be heard (or as in a Christopher Nolan film, so it can’t be heard), and voila.
How can Smartsound Cloud help you with your project’s Underscore?
As I’ve mentioned, you don’t want overbearing music to drown out your dialogue. You want something soft and nearly unnoticeable, but still supports the emotions your seeking. With Smartsound Cloud, you can easily achieve this effect. Especially if you already have chosen the video’s main track from our catalogue.
Using the mixing panel for Underscore
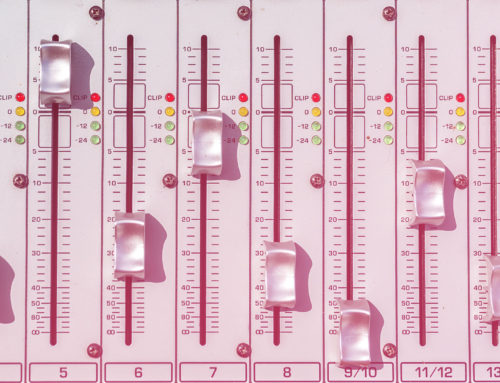
If you already have a track that you like, open it on the timeline. Determine how long your scene is and drag the track to the right time. Look to the mixing panel. There you can adjust the different instrumentation. For underscore, you want a soft and non-distracting instrumentation, which can usually be found with anything labelled “pads” or “strings” or the like. Drums and/or bass might be okay, depending on the track.

It’s also good to try a few of the different variations for each track. Another variation might work better for the scene, and will still stay glued together thematically with the other music of the sequence.
Here it’s best to experiment. Even better if you can bring in the video clip into the browser as well, so you can be sure to capture the exact right mood.
Changing the mix
If you want the full version to play, and then segue to a more cut down version, this is easy to do too, with our transition function. Simply apply a cut where you want the transition to occur, and then fade in the transition how you want using the transition time function, as seen below.

Add a Mix Change using the button with the +
The slider appears when a block with a “mix change” is selected
Using ducking for Underscore
Here it is also useful to upload the clip into the browser. With the track in the timeline, click on the “automation” box. You’ll now see a line representing volume across the timeline. Double click on the line to make a node, and then use these nodes to adjust the volume and how it transitions during the scene. The trick is to make the volume fade in and out slowly enough to not be noticed, and just enough to “duck” under the dialogue.

Click twice on the yellow line to add a node
Use these techniques together
Using these two techniques together, of pairing down the mix and using ducking, you can have the perfect underscore for your project. Haven’t signed up with Smartsound Cloud yet? Try it out here today!