It’s easy to get setup with a YouTube channel. Follow this guide to get you started up quick and easy!
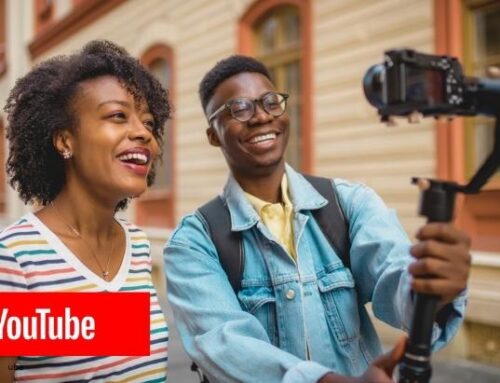
Vlogs are one of the fastest growing markets in social media today, and YouTube is the most popular venue. In fact, it was very possibly the first venue for vlogging. Whether you want to do a history show, a shopping showcase, or present your latest music tracks, it’s easy to set up the YouTube channel that’s just right for you. Here’s our easy tutorial to get you started. Also be sure not to miss our blog on what equipment you’ll need to get started right.
A personal or branded channel
If you’re looking to start you’re YouTube channel, then you have two choices: You can start producing videos on your regular YouTube account, or you can start a “Brand Account” channel. I’d highly advise setting up a Brand Account. For one, it’s free. Secondly, if you have any other playlists or random things that might unknowingly effect your brand or viewership on your regular account, this can all disappear when just starting a new channel from a blank slate.
The other advantages of starting a Brand Account are that you can allow other people to post and edit videos on your behalf, and you don’t have to start a new email, you can just use your old one.
Using your branded channel, I would then subscribe to all your favorite channels in the same category (and not anyone else). This way you can easily keep track of what other people are doing and what techniques they’re using on their channels. Farm their good ideas and adapt them to improve your own style. A little lost on where to start your brand? Read our blog on branding.
Starting a Branded Account
It’s easy to start a Branded Account. Sign into YouTube. On the left-hand navigation bar, scroll down to Settings. It will take you to the Account page, which is the first option not on the left-hand navigation bar. You’ll see your account name, and under that Add or Manage your channel(s). Click there, and then press in the box that says Create A Channel.

To recap:
Settings –> Account –> Add or Manage Your Channel(s) –> Create a Channel
And you’re DONE!
But not so fast, now you need to make it look a bit more professional.
A First Look
When you first create your channel, you’ll immediately be brought to the “Your Channel” page (which can be reached by clicking on your avatar at the top right and then clicking on Your Channel.
First though, let’s look around the screen and see what’s going on. On the top right, there’s your Channel Menu, next the Notifications, different types of YouTube, and finally Create, where you can upload a video.
Then you’ll see Customize Channel and Manage Videos.
YouTube Channel sections
Under your central Avatar, you’ll see the main presentation of your channel. Going through these one-by-one, we see:

Home – This is the page people will see first when they arrive to your YouTube channel. You can choose which videos show up here later. We’ll cover that below in the Customize Channel section.
Videos – These are all your recently uploaded videos.
Playlists – Any playlists which you have made. These can be from other channels or your own. You can select which playlists appear here for the public by clicking on View Full Playlist, then selecting Public, Unlisted, or Private.
Channels – Here will be showcased any channels which you choose to feature. This section has been made weirdly redundant, as it’s kind of moved to the main section and YouTube seems to have forgotten about this tab.
Discussion – Here you can put up random comments and questions that can engage your viewer base.
About – Any other information. If you keep up a blog, have a Patreon, or so on, this is a good spot to put in those links. Also make sure to tell about yourself, the purpose of the channel, and its intended audience. Make it easy for what people are going to see so they know what they’re getting into before they even press play.
Customize Channels
If you want to change how your channel appears, or modify anything, then this is the page to do it on. From the Your Channel screen, click Customize Channel.
If you have different segments, or want to showcase your podcast along with your other YouTube videos, then you can assign each of those videos to playlists and have them show up as “featured sections”. Just press the “Add section” button on the right and it will give you the option to add a playlist. This means that you don’t need separate YouTube channels for disparate projects, but you can unite them all under one mother brand, if you’d prefer.
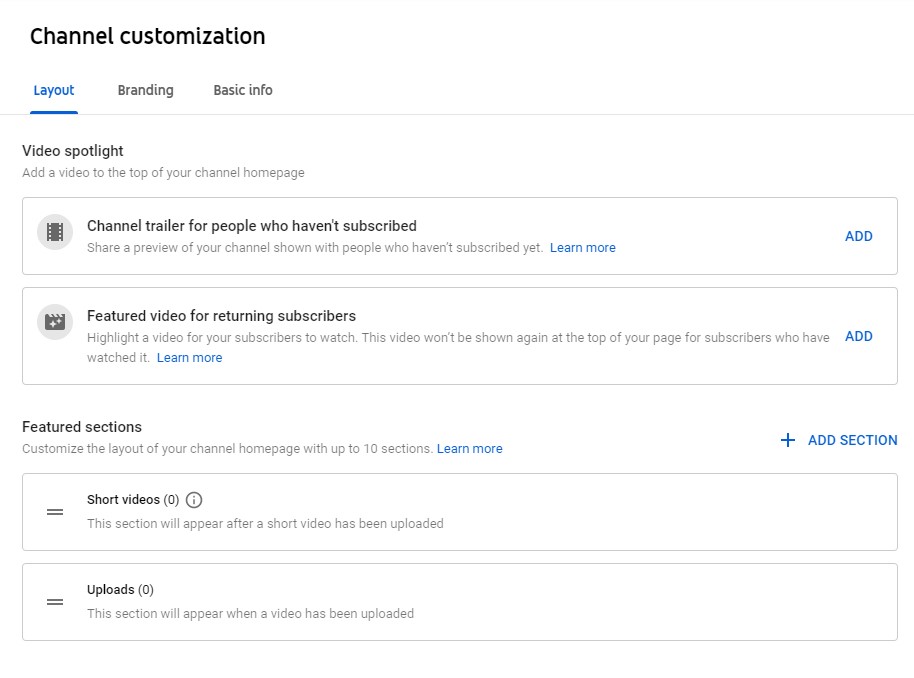
Video Spotlight
This is where you specify the large video on the top of your channel that people first see when they visit. You can set two different channels: One to be seen by someone who hasn’t yet subscribed, and one your subscriber sees.
For those that first one, it’s a good idea to set an explainer video. Talk about what the channel is about, or give them some sort of lead in that pulls them in and traps them to watching your channel.
The other video you can use as your featured video, what you want your subscribers to be sure to catch – this might be the most recent video, or perhaps a discussion about your Patreon account and why they should remember to make a donation.
Featured Sections
The featured sections part allows you to show what videos appear for browsing on your main Your Channel page. Here you can add a section and select from the drop-down list, which includes Popular Videos, Short Videos, Live now, Past live streams, Upcoming live streams, Single playlist, created playlist, multiple playlists, subscriptions, and featured channels (mentioned above, as I noted, redundantly).
If you have a variety show, it’s a good idea to utilize your playlist setup here. Label one setup as “Shopping”, for example, the next as “Day In the Life”, or whatever else you do on your channel. Likewise, if you’re a music channel, you can use this to organize your albums.
Branding
Under this section found on the tab above, below “Channel customization”, you can make sure that your branding is shown and consistent, as I’ve mentioned before. This is where you’ll set your profile banner and Avatar (profile picture).
Profile Picture
This is the spot to place your lovely face, or to show off your brand logo. You’ll want a picture that’s no more than 98×98 pixels and under 4 MB. They’ll want a square, but really you need to be designing it with a circle in mind, as that’s what will show up.
Banner image
The banner image is the huge display that goes on top. There you’ll need AT LEAST 2048×1152 pixels and with under 6 MB. Stick to highlighting your brand colors. You may want your brand name, or not, depending on what your Avatar is. Taking a look at Coca Cola’s design, we see that they use their brand name on their Avatar, so they only put their graphic logo on the banner.
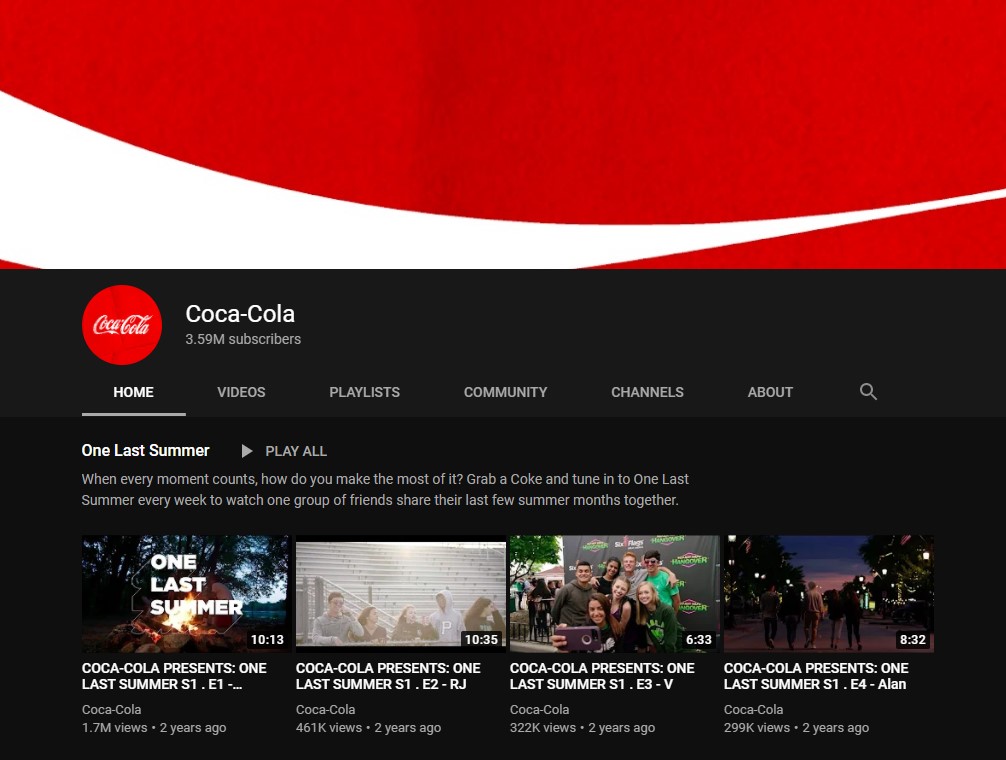
Look at established brands and see how they portray themselves
Video Watermark
A video watermark isn’t entirely necessarily, but if you are a little worried about someone stealing your footage, then you should place one here. Generally people will use either their brand logo, the title of the channel, or their name. You’ll want a PNG, GIF, BMP, or JPEG under 1 MB and 150×150 pixels in size.
Basic Info
Finally, this is where we can edit everything that shows up on your About page, writing in your description, find your Channel URL (and personalize it once you have enough subscribers), add your outside links, and your contact info.
Now you’re all set! Stay tuned where we’ll look through tools you can use to design your own logo and banner, and how to upload your first YouTube video. Check out our earlier blog about what gear you should consider getting before starting up.